
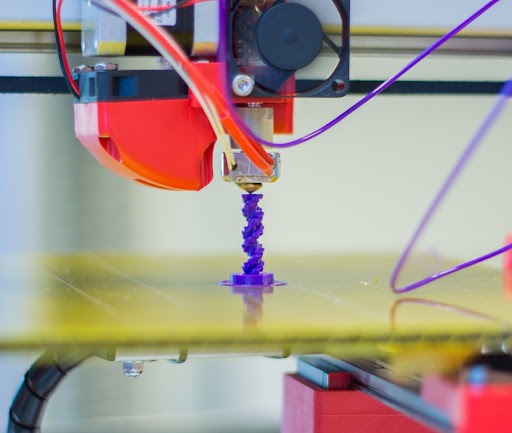
A good 3D printer maintenance routine covers eight areas: nozzle cleaning, lubrication of rails and bearings, V-slot wheel checks, fan cleaning, belt tension, cable inspection, firmware updates, and build surface care. Most of these take only a few minutes and prevent the majority of print failures and repair calls we see.
Many new owners don’t think about maintenance until prints start failing. After a few hundred parts, though, worn nozzles, loose belts, and dusty fans start showing up as poor surface quality, failed jobs, and unexpected downtime. A simple routine keeps your printer reliable and costs far less than 3D printer repair.
This checklist covers desktop and prosumer printers first, then production machines like Stratasys Fortus systems, which need a more structured plan.
3D Printer Maintenance Schedule at a Glance
A 3D printer maintenance checklist is a list of routine tasks grouped by how often they should be done. Use this table as your starting point, then adjust based on how many hours your printer runs each week.
| Task | How often |
| Wipe the nozzle and clean the build surface | Before every print |
| Check for filament debris and remove print scraps | Daily or weekly |
| Blow dust out of fans and electronics | Monthly |
| Check belt tension and V-slot wheels | Monthly |
| Inspect cables and connectors | Monthly |
| Cold pull or deep clean the nozzle | Every few spools or when changing materials |
| Lubricate rails, rods, and bearings | Every 500 to 1,000 print hours |
| Check for firmware updates | Every few months |
| Replace the nozzle | Every 3 to 6 months of regular use, sooner with abrasive filament |
| Professional inspection and calibration | Once a year for desktop printers, on a set schedule for production machines |
1. Clean the Nozzle Regularly
Wipe the outside of your nozzle before each print, do a deeper clean or cold pull every few spools or whenever you switch materials, and replace a brass nozzle every 3 to 6 months of regular use. Abrasive filaments like carbon fiber or glass-filled materials wear nozzles out much faster.
Clogged nozzles are one of the most common problems in FDM printing. A clog can stop a build completely, or cause the printer to keep moving while nothing comes out, which is often called “printing air.”
Signs your nozzle needs attention:
- Filament curls or bends as it comes out of the nozzle
- Burn marks or plastic buildup on the heat shield
- Strings of old material hanging from the tip
- Thin, weak, or gappy layers
- No extrusion at all
How to clean it:
- Heat the nozzle and scrub the outside with a brass wire brush
- For clogs, heat to printing temperature and push filament through by hand
- Use a thin cleaning needle to break up a stubborn blockage
- Do a cold pull to drag debris out with the filament
- Replace the nozzle if the opening looks worn or oval
2. Lubricate Linear Rails and Bearings
Lubricate your printer’s linear rails, smooth rods, and bearings every 500 to 1,000 print hours, or sooner if you hear squeaking or notice rough movement. Always wipe off old grease and dust first, then apply a thin layer of the lubricant your manufacturer recommends.
What to use on each part:
- Linear rails: light grease, often lithium-based, worked in by moving the carriage back and forth
- Smooth rods: light machine oil or PTFE-based lubricant
- Z-axis lead screws: clean off old grease, then apply a light coat of fresh grease
Some printers make this harder because the rods have to be removed to clean them and the bearings properly. Take your time and note how parts come apart.
Use less than you think. Too much lubricant collects dust and filament debris, which turns into a gritty paste that wears parts faster. Never lubricate belts or V-slot wheels, since they rely on grip and clean surfaces.
3. Inspect and Tighten V-Slot Wheels
Check V-slot wheels monthly. A properly adjusted wheel turns when you rotate it with your fingers but carries the carriage with it and has a little resistance.
How to check and adjust them:
- Turn each wheel with your fingers while the printer is off
- If it spins freely without moving the carriage, it is too loose
- If you can barely turn it, it is too tight
- Adjust by turning the eccentric nut a small amount at a time with a wrench
- Stop as soon as the wobble is gone
Loose wheels let the print head or bed wobble, which shows up as ringing, uneven walls, and dimensional errors. Overtightening is just as harmful, because tight wheels develop flat spots, wear out early, and collect dust on the rolling surface.
Replace a wheel if you see:
- Cracks in the wheel
- Flat spots on the rolling surface
- Debris packed into the groove that won’t clean out
Polycarbonate (PC) wheels are a stiffer, longer-lasting upgrade for many printers.
4. Clean the Fans
Clean your printer’s fans monthly with compressed air, and replace any fan that makes grinding or rattling noises or spins slower than normal.
Common causes of fan failure:
- Dust and filament debris building up on the blades
- Worn bearings from long running hours
- Excess heat near the hot end
- Damaged or pinched wires
Fans control cooling for both the hot end and your printed parts. A dusty hot end fan can let heat creep up into the cold end, which leads to stringing, soft filament, and clogs. A weak part cooling fan hurts overhangs and fine details. Dust in the power supply or mainboard fan can cause electronics to overheat.
How to clean them:
- Hold the blades still with a finger or small tool
- Blow compressed air across the blades and housing
- Use a cotton swab lightly dampened with isopropyl alcohol for caked dust
- Check that the fan spins smoothly and quietly afterward
Letting compressed air spin the blades at high speed can damage the bearing, so always hold them in place.
5. Keep Belt Tension Correct
A correctly tensioned belt feels firm, doesn’t sag, and makes a low note when plucked like a guitar string. It should grip the pulley without skipping, but not be so tight that it strains the motor and idler bearings. Check belt tension monthly.
Poor belt tension is one of the most common reasons owners end up needing maintenance service, mostly because people assume belts stay tight after setup. Belts stretch slightly with use, and tensioner screws can work loose from vibration.
Signs your belts are too loose:
- Layer shifting
- Ghosting or ringing on outer walls
- Rounded or inaccurate corners
- A belt that sags or flaps when the head moves
Signs your belts are too tight:
- Motors running hot or struggling
- Squeaking or wear on idler bearings
- Belts wearing out faster than expected
Replace any belt that won’t hold tension or shows fraying or missing teeth. Some manufacturers publish a target belt frequency you can check with a phone app for a more precise reading.
6. Check Cables and Prevent Cable Damage
Inspect cables monthly, especially the heated bed and hot end cables, since these move with every print.
How to prevent cable damage:
- Use strain relief at every moving connection
- Route cables through a cable chain or protective sleeve
- Avoid tight bends and sharp edges
- Make sure connectors are fully seated, and screw terminals are tight
Repeated bending slowly breaks the copper strands inside a cable, even when the outer jacket looks fine. This causes intermittent faults, temperature errors, and in the worst case, overheating at the connector, which is a real fire risk. Heated bed cables carry high current and are the most common failure point.
What to look for during inspection:
- Kinks or cracked insulation
- Discolored or melted connectors
- Loose screw terminals
- Temperature readings that jump when you gently wiggle a cable
Replace damaged cables right away rather than taping them.
7. Update the Firmware
Check for firmware updates every few months and install them between jobs, not in the middle of a production run. Only update when the new version fixes a problem you have or adds something you need.
Reputable manufacturers release updates to fix bugs, improve safety features like thermal runaway protection, and sometimes add new features.
Before and after updating:
- Read the release notes
- Back up your current settings and calibration values
- Know how to reflash the previous version if something goes wrong
- Recheck calibration and run a test print after the update
Low-cost printers often stop receiving updates. In that case, look for well-supported community firmware for your model, but only if you are comfortable reconfiguring the printer. On industrial machines, firmware and controller software updates should be handled by the manufacturer or a qualified service provider.
8. Protect the Build Surface
The best way to protect a build surface is to keep it clean, let prints cool before removing them, and never pry parts off with sharp metal tools.
Build surface care tips:
- Clean with isopropyl alcohol before prints to remove finger oils
- Let prints cool fully before removing them
- Use a plastic scraper instead of metal tools
- Use a flexible spring steel sheet so you can bend parts off
- Add Kapton tape or painter’s tape on glass or bare aluminum for protection
- Use a thin layer of glue stick as a release layer with PETG on smooth PEI
Replace a build sheet once adhesion becomes unreliable even after cleaning.
Preventative Maintenance for Stratasys Fortus and Production Machines
Stratasys Fortus machines and other production 3D printers need a structured preventative maintenance schedule that combines daily operator checks with planned professional service. Pivot AM recommends a 24-month preventative maintenance plan for Fortus machines that lays out which parts to inspect and replace at each stage.
Operator-level tasks:
- Keep the tip wipe assembly and purge area clean
- Check tips for wear and material buildup
- Keep the oven and platen clean
- Watch for loading errors or changes in part quality
- Replace tips, tip shrouds, and tip wipe assemblies on schedule
Professional service tasks:
- Print head inspection and service
- XY gantry and Z stage inspection
- Vacuum system and platen checks
- Oven heaters, fans, and filters
- Full calibration after service
Keeping a supply of common wear items on hand reduces downtime, so see our guide to Fortus spare parts availability. Pivot AM offers both on-site Fortus maintenance plans and depot repair.
Recommended Maintenance Intervals for Production 3D Printers
Production 3D printers should get daily or per-job operator checks, monthly inspections of wear items, and professional preventative maintenance at least once or twice a year, or on an hours-based schedule for machines that run around the clock.
- Daily or per job: clean tips and purge areas, check for errors and debris
- Monthly: inspect consumables, filters, belts, and cables
- Every 6 to 12 months: professional preventative maintenance and calibration
- Multi-shift machines: schedule service by print hours rather than calendar months
High-temperature materials like ULTEM and PEKK wear tips and heated components faster than standard materials. A maintenance log of hours, errors, and parts replaced makes it much easier to spot problems early.
How to Extend the Lifespan of an Industrial 3D Printer
The best way to extend the life of an industrial 3D printer is to follow a preventative maintenance schedule, use quality materials and parts, keep the machine in a clean and stable environment, and fix small problems before they spread to other components.
- Store and run material dry, since moisture damages both parts and print heads
- Keep the room at a steady temperature and humidity
- Keep dust and debris away from the machine
- Use genuine or proven equivalent parts and materials, like Argyle FDM material for Stratasys machines
- Train operators to report unusual noises and errors instead of clearing them and moving on
- Keep a log of hours, errors, and parts replaced
Machines treated this way last a long time. Many Stratasys Fortus printers built in the late 2000s are still producing parts today. Our article on servicing older Fortus machines covers what keeps older equipment running.
Common 3D Printer Maintenance Mistakes
The most common maintenance mistakes are overtightening, over-lubricating, ignoring early warning signs, and waiting for something to break before doing any maintenance.
- Overtightening belts and V-slot wheels
- Using too much lubricant, or the wrong type
- Lubricating belts or V-slot wheels
- Ignoring small noises and minor quality changes
- Scraping build plates with metal tools
- Leaving filament exposed to humidity
- Updating firmware in the middle of a project
- Skipping calibration after replacing parts
- Using cheap replacement parts on expensive machines
- Keeping no maintenance records
Signs Your 3D Printer Needs Professional Maintenance
Your 3D printer needs professional maintenance when routine cleaning and calibration no longer fix the problem, or when the machine is overdue for scheduled service. Industrial and production machines should get professional service on a regular schedule even when they seem to be running fine.
Call a technician if you notice:
- Print quality keeps getting worse after routine maintenance
- The same error keeps coming back
- New grinding, clicking, or rattling noises
- Temperature readings that jump around
- Motors skipping steps
- Loading failures on a Fortus
- Parts that no longer hold tolerance
- Flickering power, burnt smells, or any other electrical issue
Electrical problems should always be handled by a qualified technician.
DIY or Professional 3D Printer Maintenance?
Most owners can handle daily and monthly tasks themselves. Hire a professional for industrial machines, complex repairs, and any printer where downtime is expensive.
Tasks you can usually do yourself:
- Nozzle and build surface cleaning
- Fan cleaning
- Belt and V-slot wheel checks
- Lubrication
- Basic firmware updates on desktop printers
Tasks best left to a professional:
- Maintenance on Fortus and other production machines
- Print head and electrical repairs
- Full machine calibration
- Motion system and vacuum system service
- Any repair where a mistake could damage expensive parts
A professional 3D printer maintenance service brings the right parts, tools, and calibration procedures, and can often spot wear before it causes a failure.
Buying quality equipment helps too. A well-built machine, including a refurbished Stratasys or refurbished 3D Systems printer, is usually cheaper to own over time than a low-cost printer that needs constant repair. For a closer look at costs, see what 3D printer maintenance really costs, and repair vs. replace.
Wipe the outside of the nozzle before every print, deep clean it or do a cold pull every few spools or when changing materials, and replace a brass nozzle every 3 to 6 months of regular use. Abrasive filaments wear nozzles out faster.
A 3D printer maintenance checklist is a list of routine tasks grouped by frequency. It usually covers nozzle cleaning, lubrication, belt tension, V-slot wheels, fans, cables, firmware updates, and build surface care.
Wipe off old grease and dust, then apply a thin layer of the lubricant your manufacturer recommends, usually light grease for linear rails and light oil or PTFE lubricant for smooth rods. Move the carriage back and forth to spread it. Do this every 500 to 1,000 print hours.
A correctly tensioned belt feels firm, doesn’t sag, and makes a low note when plucked. It should grip the pulley without skipping but shouldn’t be so tight that it strains the motor or bearings.
Fans usually fail from dust buildup, worn bearings, heat, or damaged wires. Clean them monthly with compressed air while holding the blades still, and use a cotton swab with isopropyl alcohol for caked dust. Replace any fan that grinds or spins slowly.
Turn each wheel with your fingers. It should move the carriage with it and have light resistance. If it spins freely, tighten the eccentric nut a little at a time until the wobble is gone, without making the wheel hard to turn.
Check for updates every few months and install them between jobs. Read the release notes, back up your settings first, and recheck calibration after updating.
Keep it clean with isopropyl alcohol, let prints cool before removing them, and never pry parts off with sharp metal tools. A flexible spring steel sheet or a layer of Kapton tape adds protection and is easy to replace.
Use strain relief at every moving connection, route cables through a cable chain or sleeve, and avoid tight bends. Inspect heated bed and hot end cables monthly for kinks, cracked insulation, and discolored connectors.
A Fortus preventative maintenance schedule combines daily operator checks of tips, the tip wipe assembly, oven, and platen with planned professional service of the head, gantry, vacuum system, and oven. Pivot AM follows a 24-month plan that sets out what to inspect and replace at each stage.
Call a professional when quality keeps dropping after routine cleaning, errors keep returning, you hear new grinding or clicking, or scheduled service is overdue. Production machines should be serviced on a set schedule even when running well.
The most common mistakes are overtightening belts and wheels, over-lubricating, ignoring small noises, skipping calibration after repairs, and waiting for a breakdown before doing any maintenance.
Follow a preventative maintenance schedule, use quality materials and parts, keep material dry, keep the room clean and stable, and fix small problems early. Many well-maintained Fortus machines have run for more than 15 years.
Production printers need daily operator checks, monthly inspections of wear items, and professional preventative maintenance at least once or twice a year. Machines running multiple shifts should be serviced on print hours rather than calendar months.
Production printers need daily operator checks, monthly inspections of wear items, and professional preventative maintenance at least once or twice a year. Machines running multiple shifts should be serviced on print hours rather than calendar months.
Handle routine cleaning, belt checks, and lubrication yourself. Hire a professional for industrial machines, print head and electrical work, full calibration, and any printer where downtime is costly.